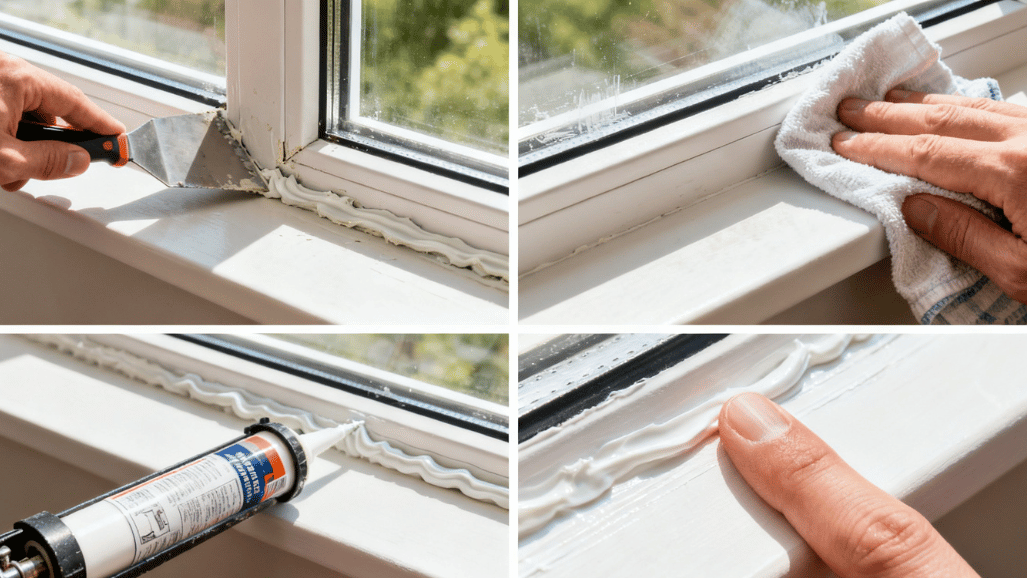
How to reseal windows is an important and practical process that helps maintain your home’s energy efficiency, prevent water leaks, and improve indoor comfort. Over time, the sealant around windows can crack, shrink, or wear out due to exposure to weather, sunlight, and temperature changes, allowing air drafts and moisture to enter.
To reseal windows effectively, you should start by removing the old or damaged sealant using a utility knife or scraper, ensuring the surface is clean and smooth. Next, clean the area thoroughly with a cloth, mild detergent, and rubbing alcohol to remove any dust, grease, or residue, as this helps the new sealant adhere properly.
After applying the sealant, smooth it with a wet finger or a finishing tool to create a neat and professional appearance. Finally, allow the sealant to cure fully according to the manufacturer’s instructions.
| Section | Summary |
| Intro | Improves comfort & efficiency |
| Purpose | Seals gaps and prevents damage |
| Importance | Stops drafts & leaks |
| Benefits | Saves energy & cost |
| Signs | Cracks, air, moisture |
| Causes | Weather, aging, and moisture |
| Process | Remove, clean, seal |
| Steps | Apply, smooth, cure |
| Tools | Gun, caulk, scraper |
| Materials | Sealant, cleaner, tape |
| Sealants | Silicone, acrylic, PU |
| Placement | Frame edges & gaps |
| Mistakes | Poor prep, bad caulk |
| Safety | Use gloves & tools carefully |
| Maintenance | Check & clean regularly |
| Inspection | Every 6–12 months |
| Repairs | Fix cracks early |
| Result | Better insulation & protection |
| Outcome | Long-lasting window performance |
How to Reseal Windows?
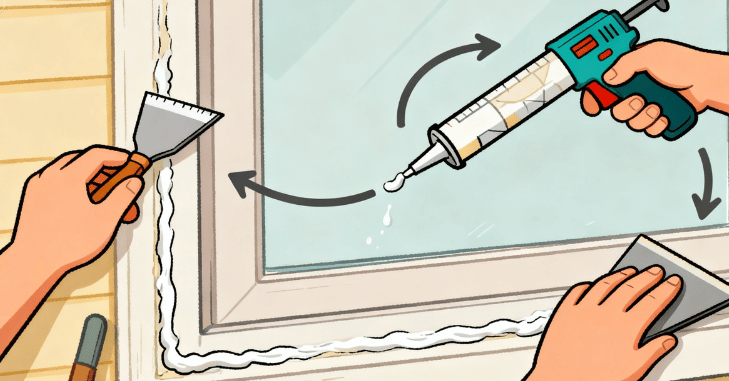
Knowing how to reseal windows is an essential home maintenance skill that helps improve energy efficiency, prevent water leaks, and maintain indoor comfort throughout the year. Over time, the sealant around window frames can crack, shrink, or peel due to exposure to sunlight, temperature changes, and moisture, which allows air drafts and water to enter the home.
To properly reseal windows, you should first remove any old or damaged caulking using a utility knife or scraper, ensuring the surface is clean and smooth. Next, thoroughly clean the area with a mild detergent and rubbing alcohol to eliminate dust, grease, and moisture, as a clean surface ensures better adhesion.
Once the surface is dry, you can apply painter’s tape along the edges for neat lines, then load a high-quality silicone or weatherproof sealant into a caulking gun and apply it evenly along the gaps between the window frame and wall.
Why Window Resealing Is Important
Resealing windows is not just a cosmetic repair; it directly impacts your home’s performance and comfort. Over time, old sealant cracks or shrinks, creating small gaps that allow air and moisture to enter.
Key Benefits of Resealing Windows
- Prevents air drafts and heat loss
- Reduces electricity and heating/cooling costs
- Stops water leaks during rain
- Improves indoor comfort and temperature stability
- Prevents mold and dampness around window frames
- Extends the lifespan of window structures
- A properly sealed window helps maintain a stable indoor environment throughout the year.
Signs That Your Windows Need Resealing
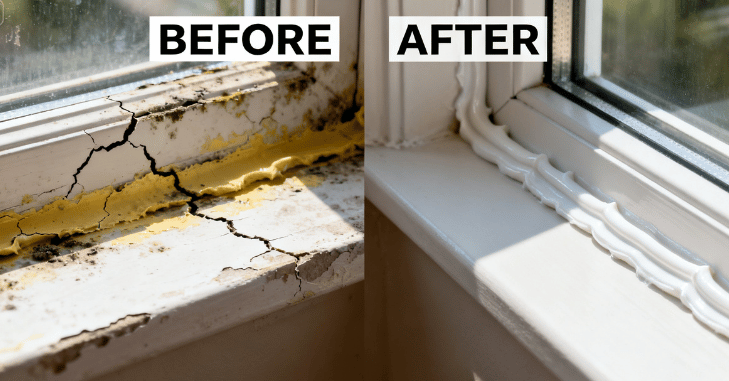
Before starting the repair, it is important to identify whether your windows actually need resealing.
- Cold air is entering near the window edges
- Visible cracks in old sealant or caulking
- Water leakage during rain
- Condensation between glass panes
- Increased outside noise indoors
- Rising energy bills without explanation
- If you notice one or more of these issues, it’s time to reseal your windows.
Tools and Materials You Will Need
Having the right tools is essential for achieving a smooth, efficient, and long-lasting window resealing process. A caulking gun is needed to apply the sealant evenly, while high-quality silicone sealant or weatherproof caulk ensures strong adhesion and protection against moisture and weather conditions.
You will also need a utility knife or scraper to remove old sealant, along with a cleaning cloth or sponge to prepare the surface. Using a mild detergent or window cleaner helps remove dirt and residue, while rubbing alcohol is useful for eliminating grease and ensuring proper bonding of the new sealant.
Painter’s tape can be applied along the edges for clean and precise lines, although it is optional. Wearing gloves is recommended for safety and to keep the process clean. Choosing a high-quality sealant is particularly important, as it directly affects durability, flexibility, and resistance to harsh weather over time.
Types of Sealants for Windows

Different sealants are used depending on the window material and weather conditions.
1. Silicone Sealant
- Highly flexible and waterproof
- Best for glass and metal frames
- Long-lasting and weather-resistant
2. Acrylic Latex Caulk
- Easy to apply and paintable
- Suitable for indoor window sealing
- Less flexible than silicone
3. Polyurethane Sealant
- Extremely strong and durable
- Ideal for outdoor heavy-duty sealing
- Resistant to harsh weather conditions
- For most home windows, silicone sealant is the preferred choice.
Step-by-Step Guide: How to Reseal Windows

| Process | Description |
| Remove Old Sealant | Use a utility knife or scraper to carefully remove all old or cracked caulking. Ensure the surface is smooth and free of residue before proceeding. |
| Clean the Surface | Wipe the area with a damp cloth and mild detergent, then use rubbing alcohol to remove dust, grease, and moisture. Allow it to dry completely. |
| Apply Painter’s Tape (Optional) | Place tape along the edges of the window frame to create clean, straight seal lines and prevent mess. |
| Load the Caulking Gun | Insert the sealant tube into the caulking gun and cut the nozzle at a 45-degree angle for better control during application. |
| Apply New Sealant | Apply a steady, even bead of sealant along the gaps between the window frame and wall for proper sealing. |
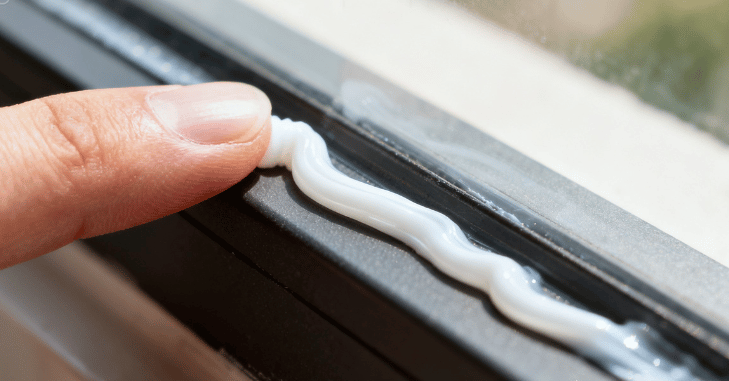
| Smooth the Sealant | Use a wet finger or smoothing tool to shape and press the sealant, ensuring a neat and professional finish. |
| Remove Tape and Let It Cure | Carefully remove the painter’s tape before the sealant dries, then allow it to cure for 24–48 hours as per product instructions. |
Common Mistakes to Avoid

Avoiding these mistakes ensures a long-lasting seal:
- Applying sealant over dirty or wet surfaces
- Using low-quality caulk that cracks quickly
- Overfilling gaps with excessive sealant
- Skipping old sealant removal
- Not allowing proper drying time
- Ignoring small cracks that expand over time
- Proper preparation is just as important as application.
Maintenance Tips for Sealed Windows
To keep your windows in good condition after resealing, it is important to follow a regular maintenance routine that helps preserve the effectiveness of the seal and prevents future damage. You should inspect the seals every 6 to 12 months to check for any signs of cracks, gaps, or wear that may require touch-ups.
Cleaning the window frames regularly is also essential, as dirt and debris buildup can weaken the seal over time. If you notice small cracks or areas where the sealant has started to deteriorate, reapply a fresh layer promptly to maintain proper insulation and protection.
It is equally important to avoid using harsh chemical cleaners near the sealed areas, as they can damage or break down the sealant material. After heavy rain or storms, always check for any leaks or moisture around the windows to ensure the seal remains intact.
When to Call a Professional?
While most resealing jobs are DIY-friendly, some situations require expert help:
- Large structural cracks around windows
- Broken or misaligned window frames
- Double-glazed window seal failure
- Persistent leaks after resealing
- Professionals can diagnose deeper structural issues that may not be visible.
Conclusion
How to reseal windows? Resealing windows is a simple yet highly effective home maintenance task that can make a noticeable difference in comfort, energy efficiency, and long-term property protection. By properly removing old sealant, cleaning the surface, and applying a high-quality weatherproof caulk, you can eliminate drafts, prevent water leakage, and reduce energy costs throughout the year.
Regular inspection and timely resealing ensure that small cracks do not turn into bigger structural problems. Whether you choose to do it yourself or seek professional help for complex issues, maintaining properly sealed windows helps keep your home warmer in winter, cooler in summer, and fully protected from external weather conditions for years to come.
Want to know about DIY Greenhouse Ideas: A Complete Guide to Building Affordable, Sustainable, and Year-Round Gardening Spaces Using Simple, Recycled, and Budget-Friendly Materials Check out our Home Improvement category.
FAQs
You should check window seals every 6–12 months and reseal them whenever you notice cracks, gaps, or air leaks.
Silicone sealant is generally the best option because it is waterproof, flexible, and long-lasting for most window types.
Yes, most window resealing jobs are DIY-friendly if you have basic tools like a caulking gun, scraper, and quality sealant.
Most sealants need around 24–48 hours to fully cure, depending on the product and weather conditions.
Unsealed windows can lead to air drafts, higher energy bills, water leaks, mold growth, and reduced indoor comfort.